How to use Survival NPC - Michael "Mike" Davies with Advanced Locomotion System V4
How to Set up Survival NPC - Michael "Mike" Davies, by Yartawah Interactive, with the Advanced Locomotion System V4 in Unreal Engine 5.0.
1. Create a New Project
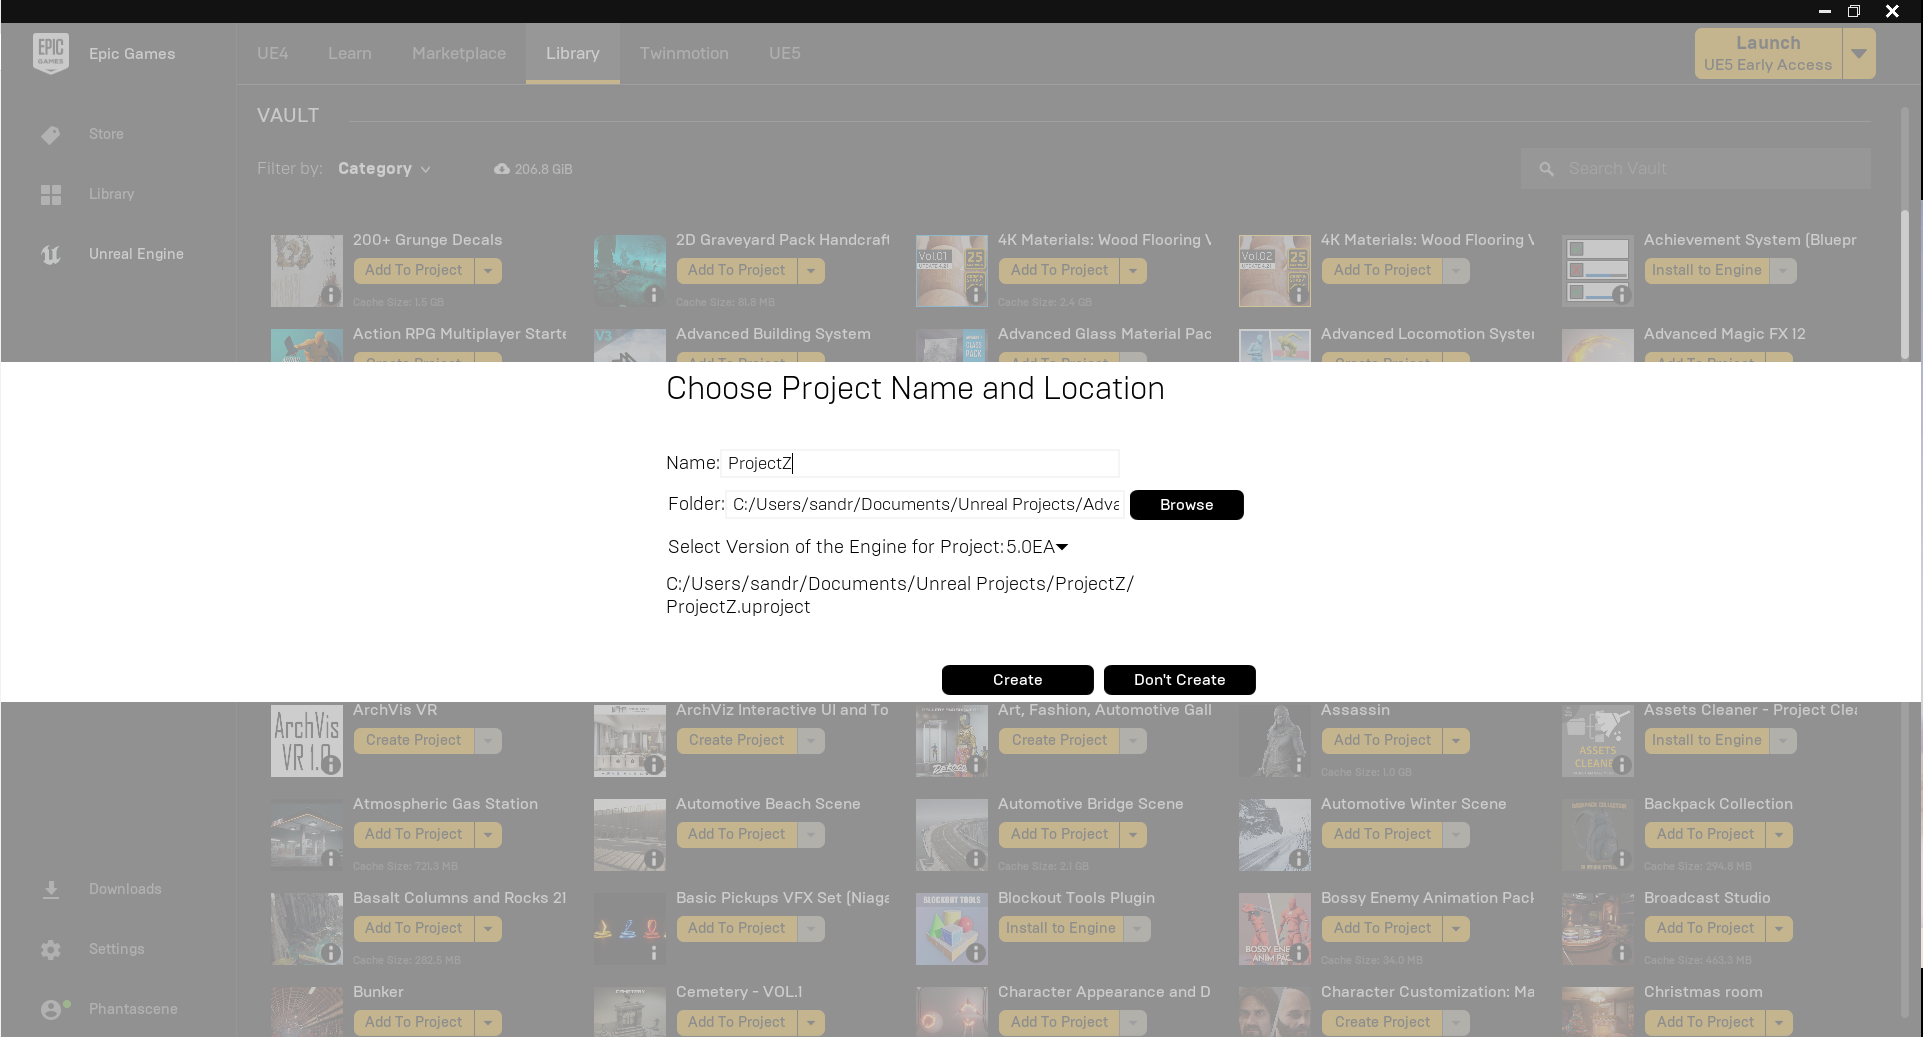
The first step is to create a new project with the Advanced Locomotion System. My project is titled ProjectZ, since I am going to be making a survival RPG set in a zombie apocalypse.
You should not need to change anything else unless you want to locate it in a different folder on your computer, so you can now click on "Create".
NOTE: You can also use an existing project that has the Advanced Locomotion System V4 loaded into it..
2. Add Survival NPC - Michael "Mike" Davies to your project
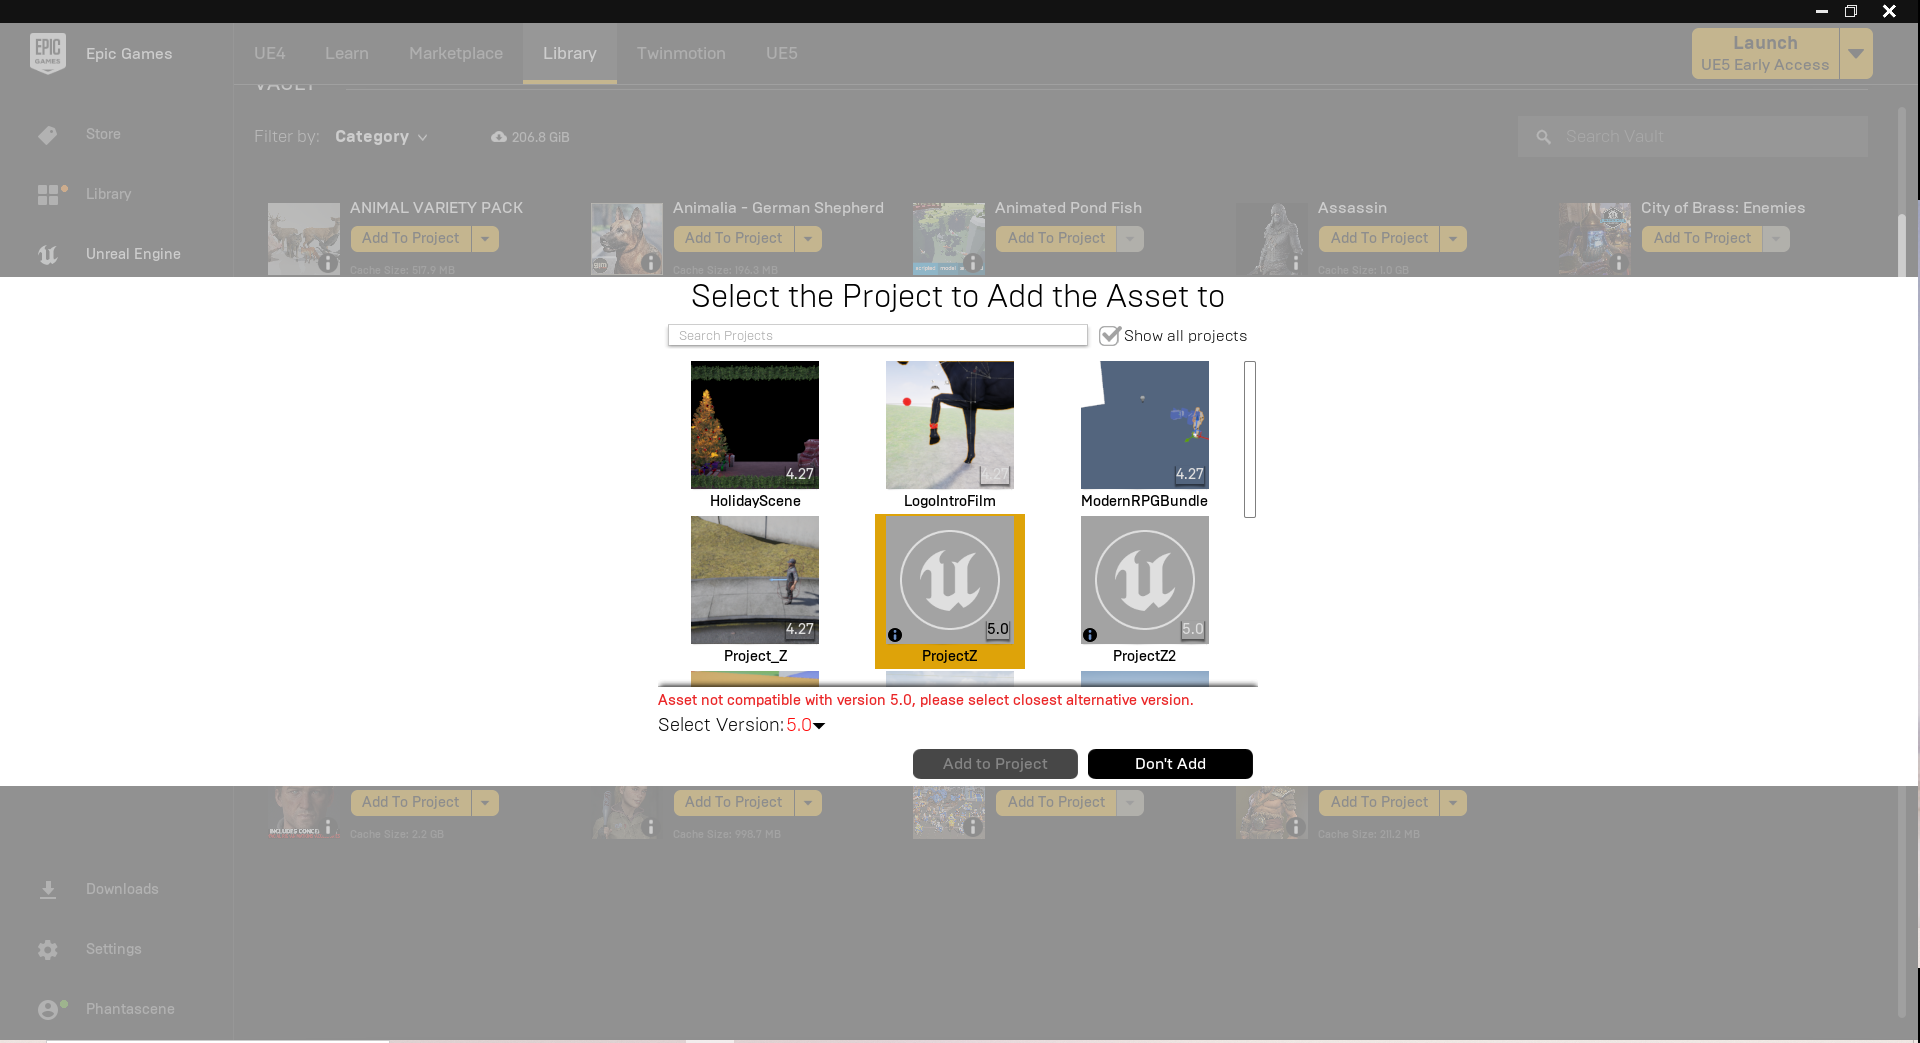
Once that is done you can add the character and once it is added you can scroll back up to the "My Projects" section and open your project.
NOTE: Depending on your PC specs, it may take a little while to load. Now is a good time to go grab a drink or just get up and stretch for a few moments.
3. Project Layout in Unreal Engine
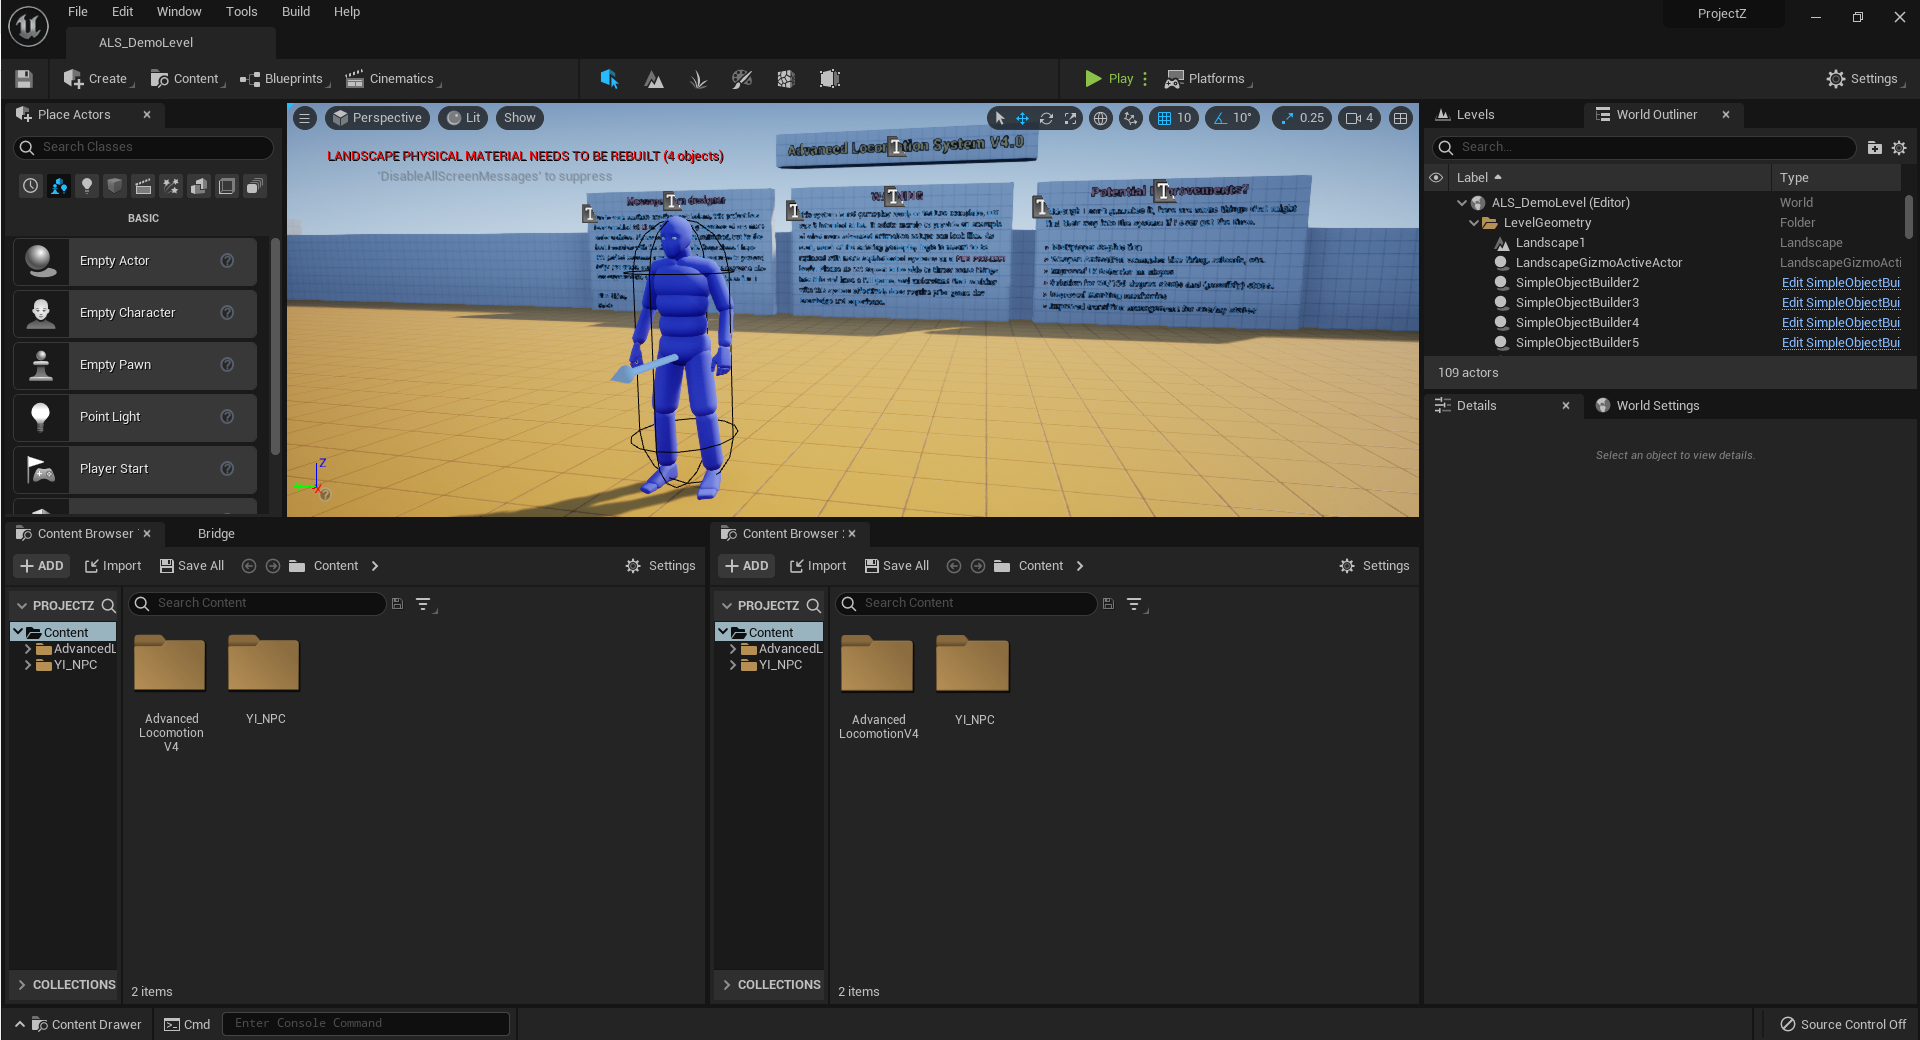
I have added a second content browser window by going to:
Window > Content Browser > Content Browser 2
Then dragging the new window to dock it beside the original Content Browser.

NOTE: I also docked the Quixel Bridge window with Content Browser 1.
4. Make New Folders
Right-Click in the content browser and make the following folder and sub-folders:
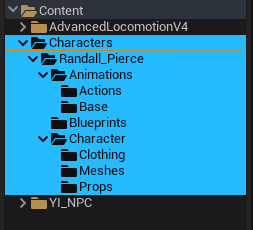
5. Create Your Skeletal Mesh
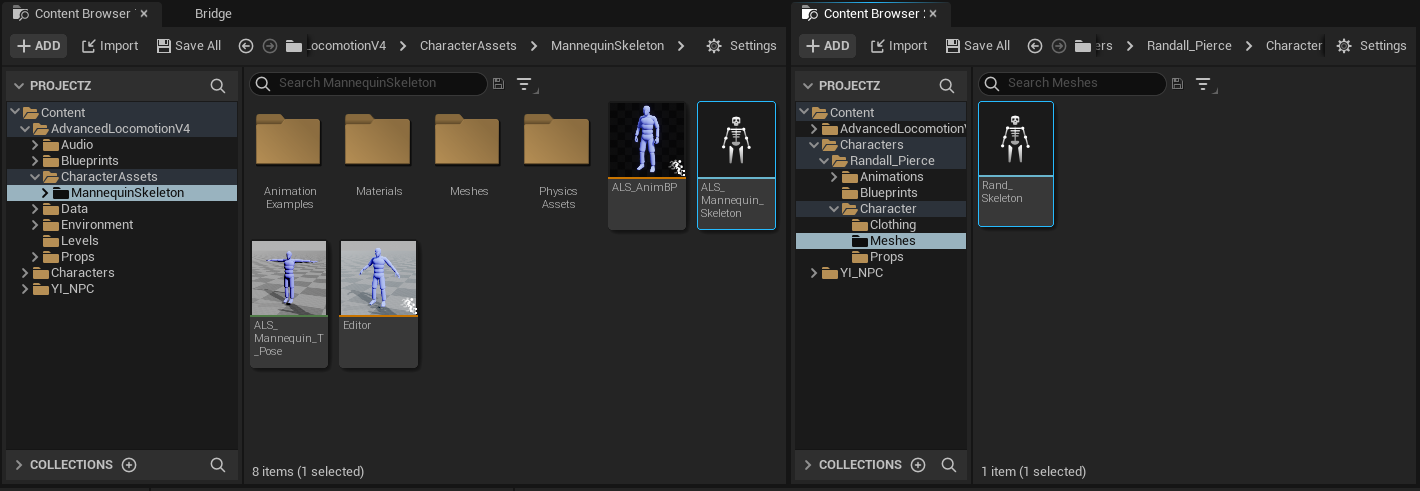
In Content Browser 1 browse to:
Content > AdvancedLocomotionV4>CharacterAssets>MannequinSkeleton
In Content Browser 2 browse to:
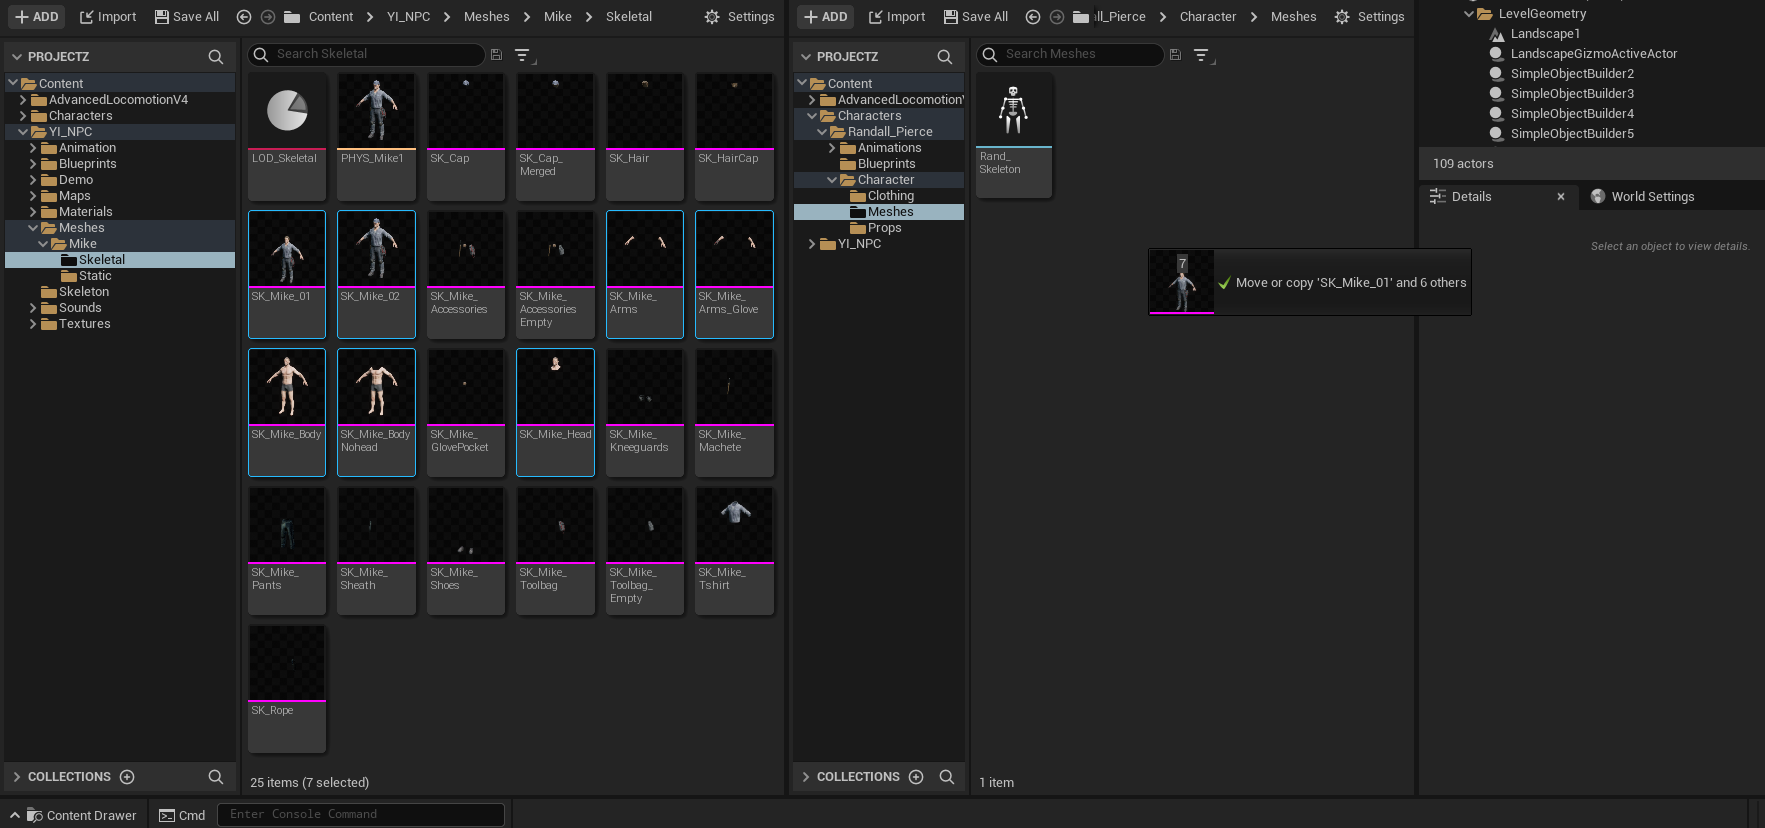
Content>Characters>Randall_Pierce>Character>Meshes
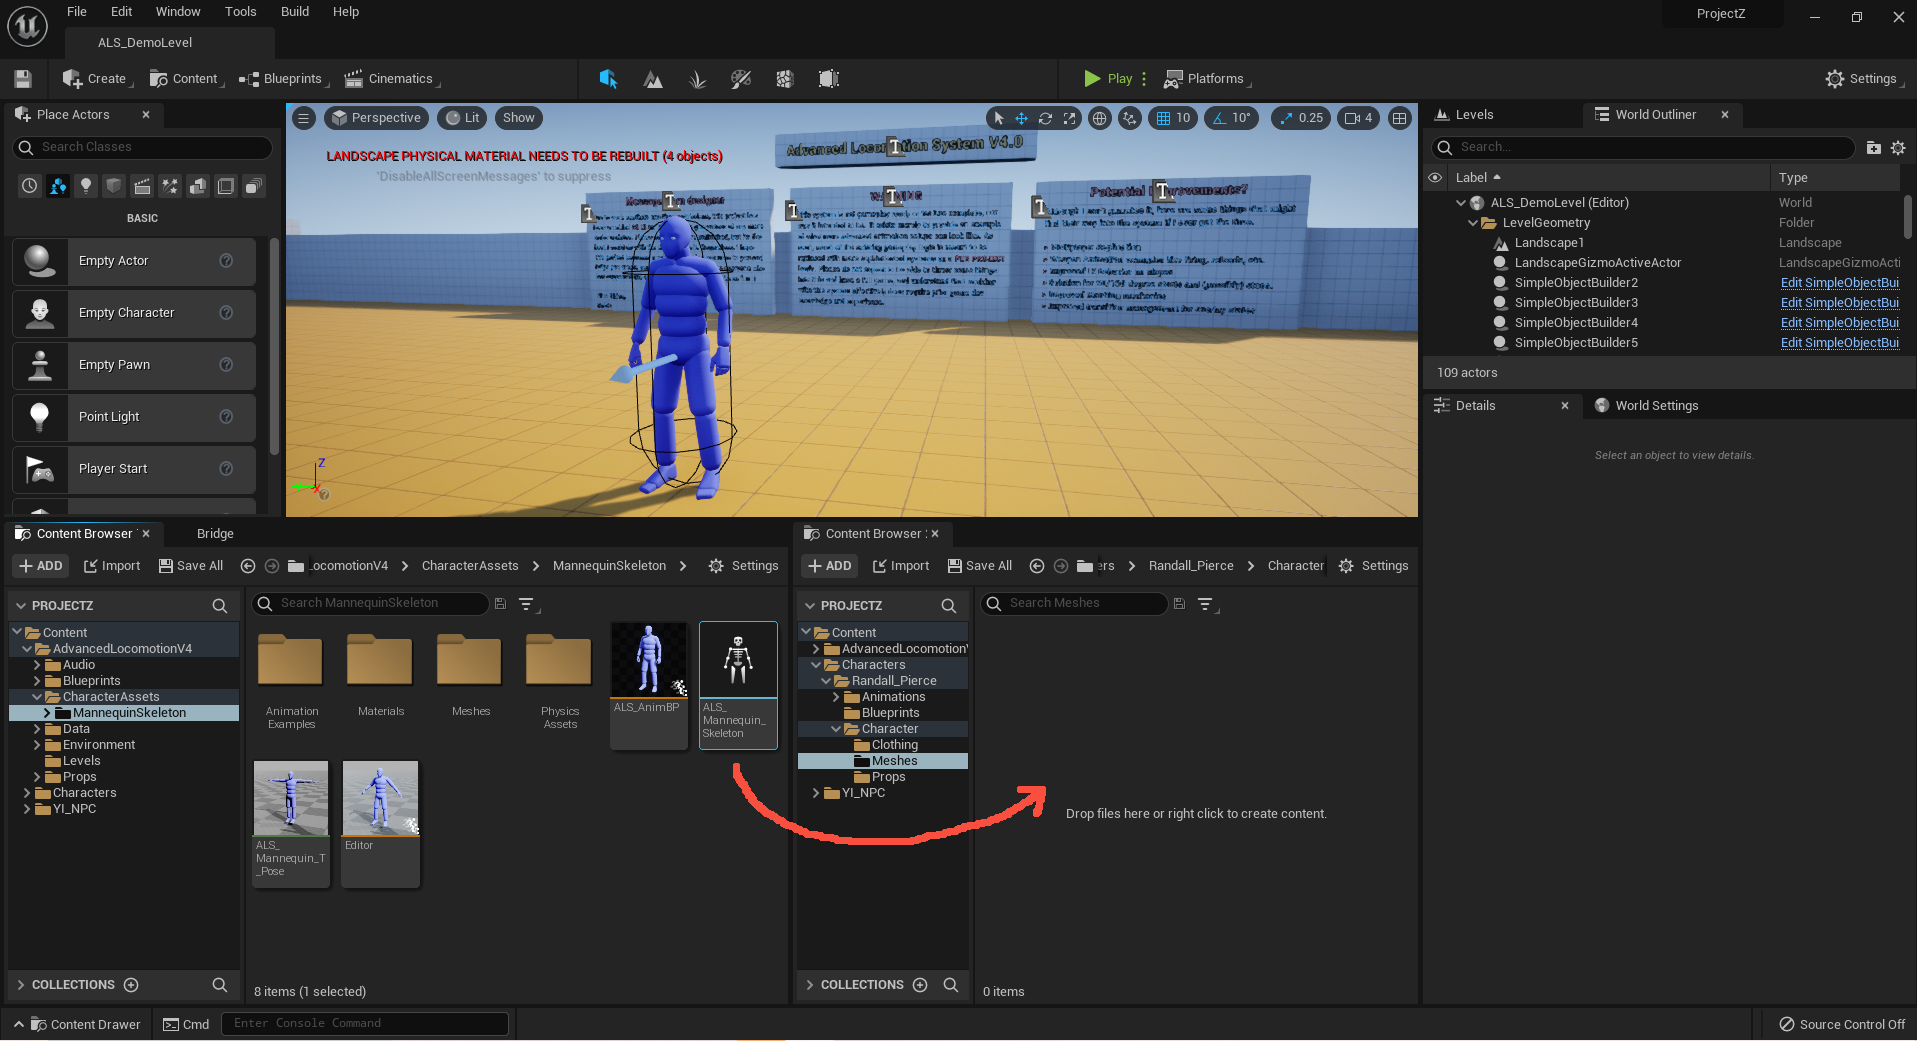
Drag the ALS_Mannequin_Skeleton into Content Browser 2 and drop it there, selecting "Copy" in the pop-up menu, then rename it: Rand_Skeleton
6. Copy Static Meshes
In Content Browser 1 browse to:
Content > YI_NPC>Meshes>Mike>Skeletal
In Content Browser 2 browse to:
Content>Characters>Randall_Pierce>Character>Meshes
Drag the meshes that make up the body pieces and the two completes characters into Content Browser 2 and drop them there, selecting "Copy" in the pop-up menu. (It should be a total of 7 meshes copied over.)
Next, you want to keep Content Browser 1 at:
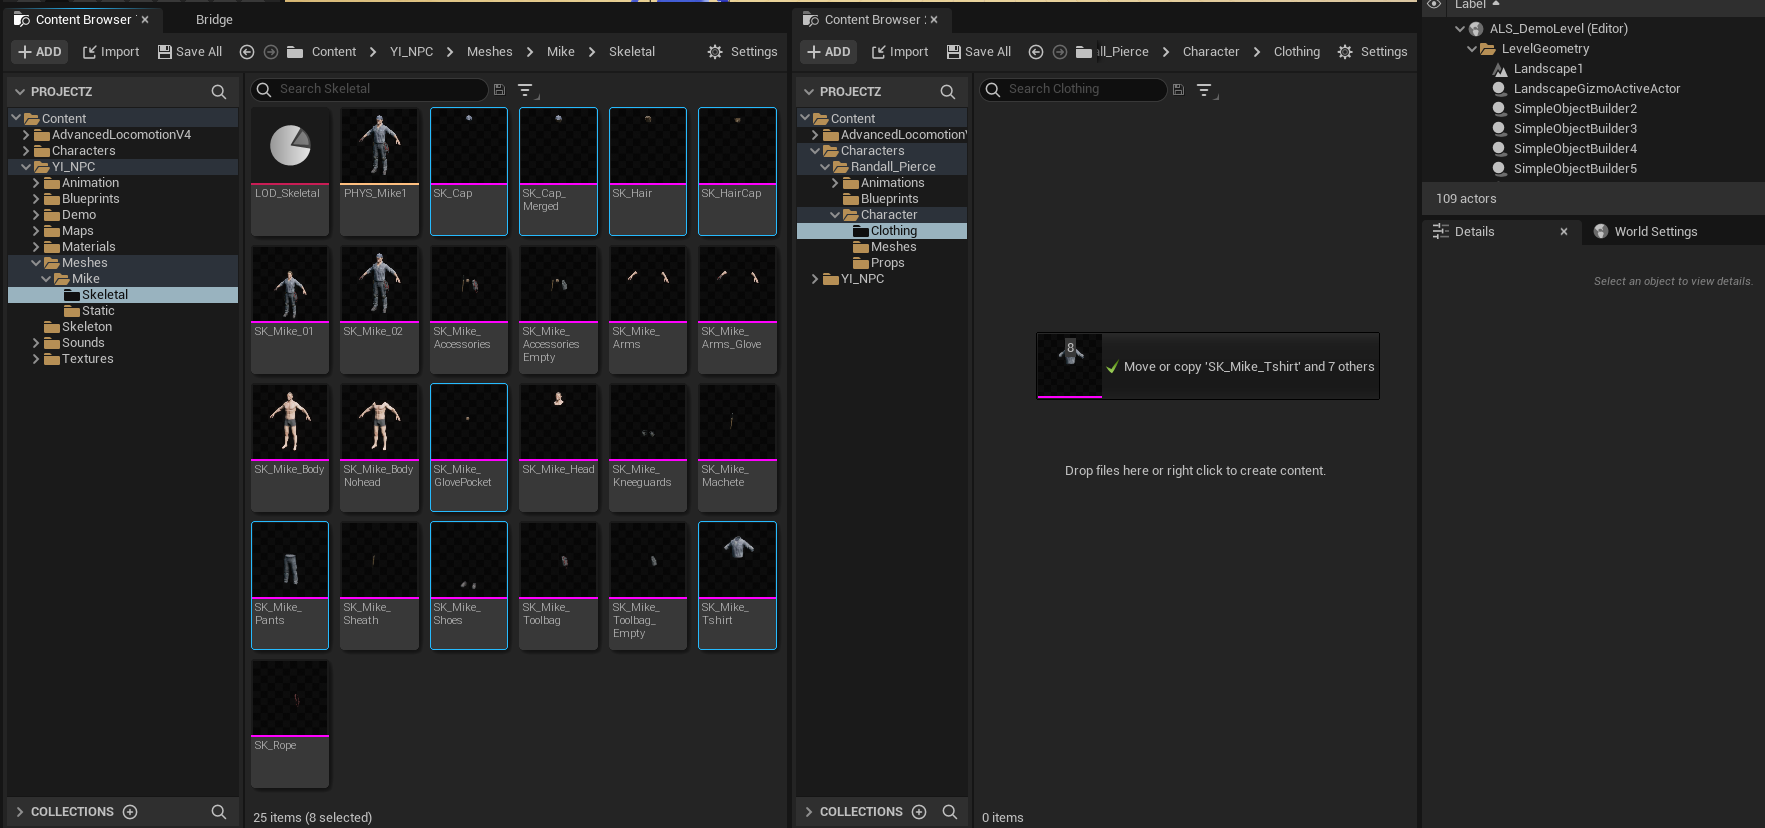
Content > YI_NPC>Meshes>Mike>Skeletal
And move Content Browser 2 to:
Content>Characters>Randall_Pierce>Character>Clothing
In Content Browser 1 select:
- SK_Cap
- SK_Cap_Merged
- SK_Hair
- SK_HairCap
- SK_Mike_GlovesPocket
- SK_Mike_Pants
- SK_Mike_Shoes
- SK_Mike_Tshirt
Finally, you want to keep Content Browser 1 at:
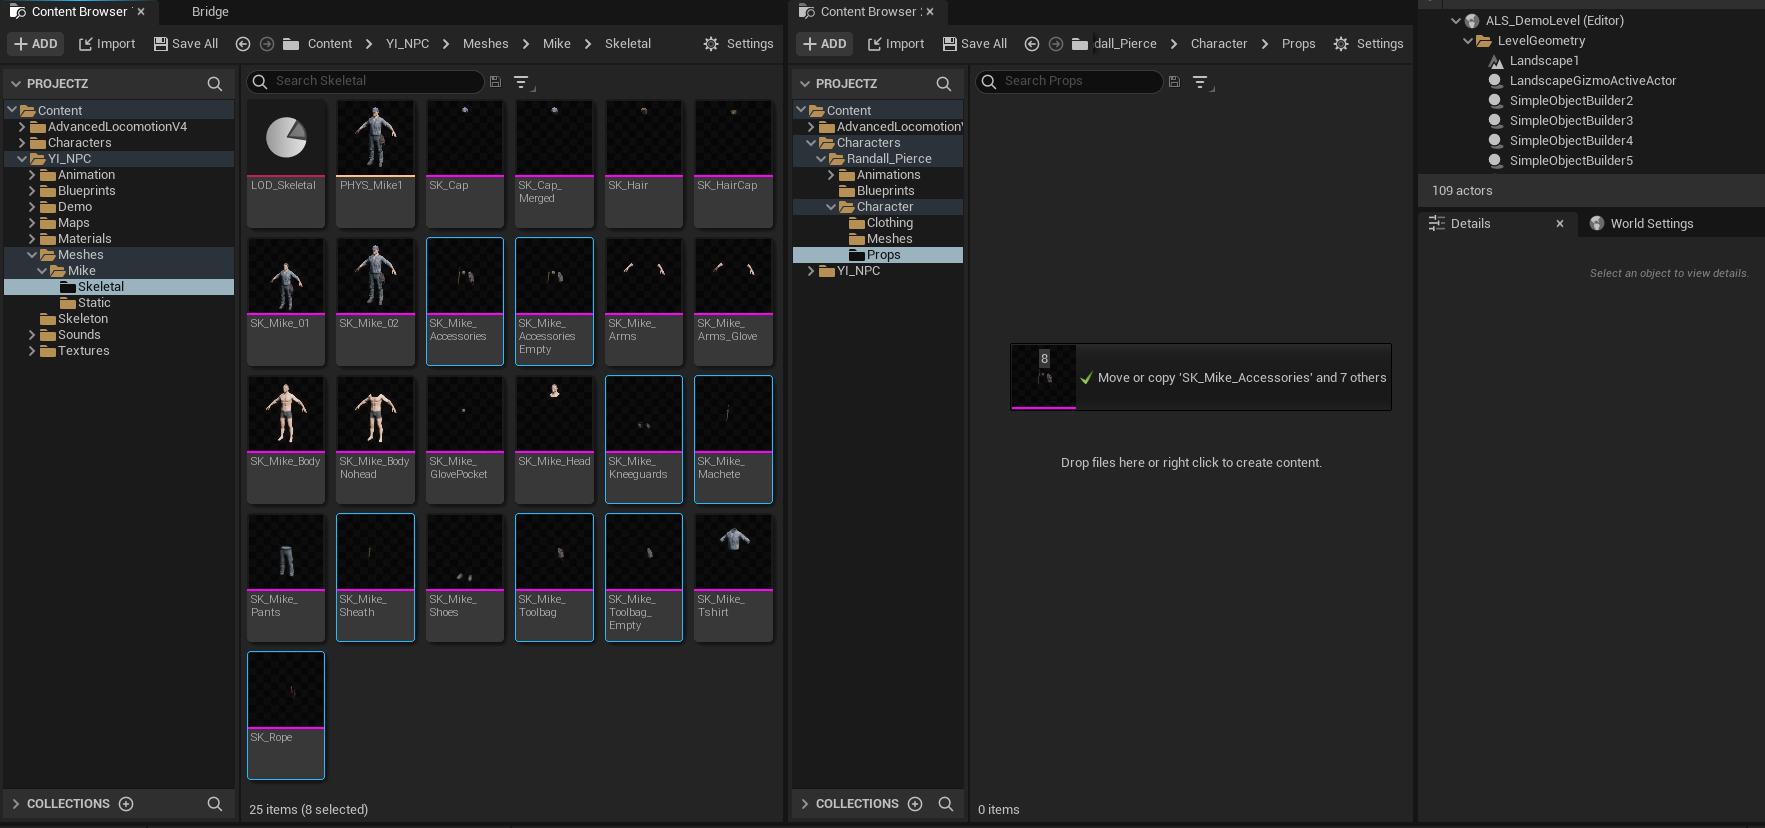
Content > YI_NPC>Meshes>Mike>Skeletal
And move Content Browser 2 to:
Content>Characters>Randall_Pierce>Character>Props
In Content Browser 1 select:
- SK_Mike_Accessories
- SK_Mike_AccessoriesEmpty
- SK_Mike_Kneeguards
- SK_Mike_Machete
- SK_Mike_Sheath
- SK_Mike_Toolbag
- SK_Mike_Toolbag_Empty
- SK_Mike_Rope
And drag them all over to Content Browser 2 and copy them into it.
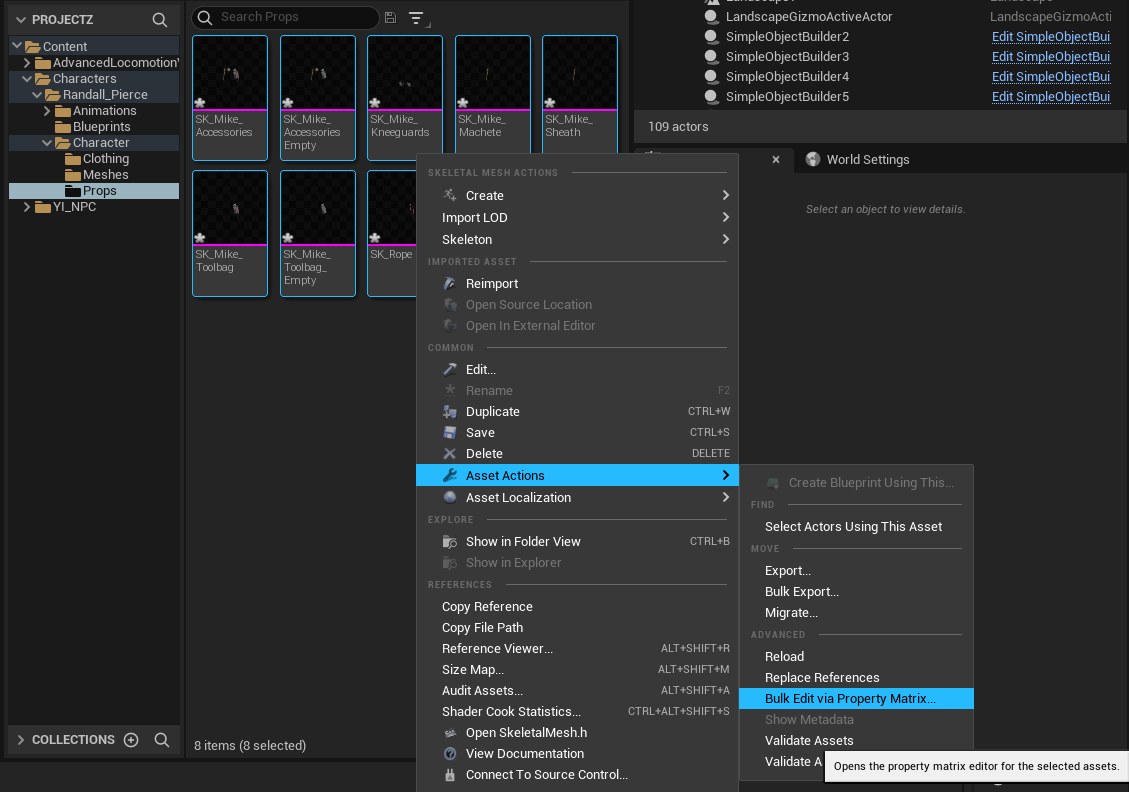
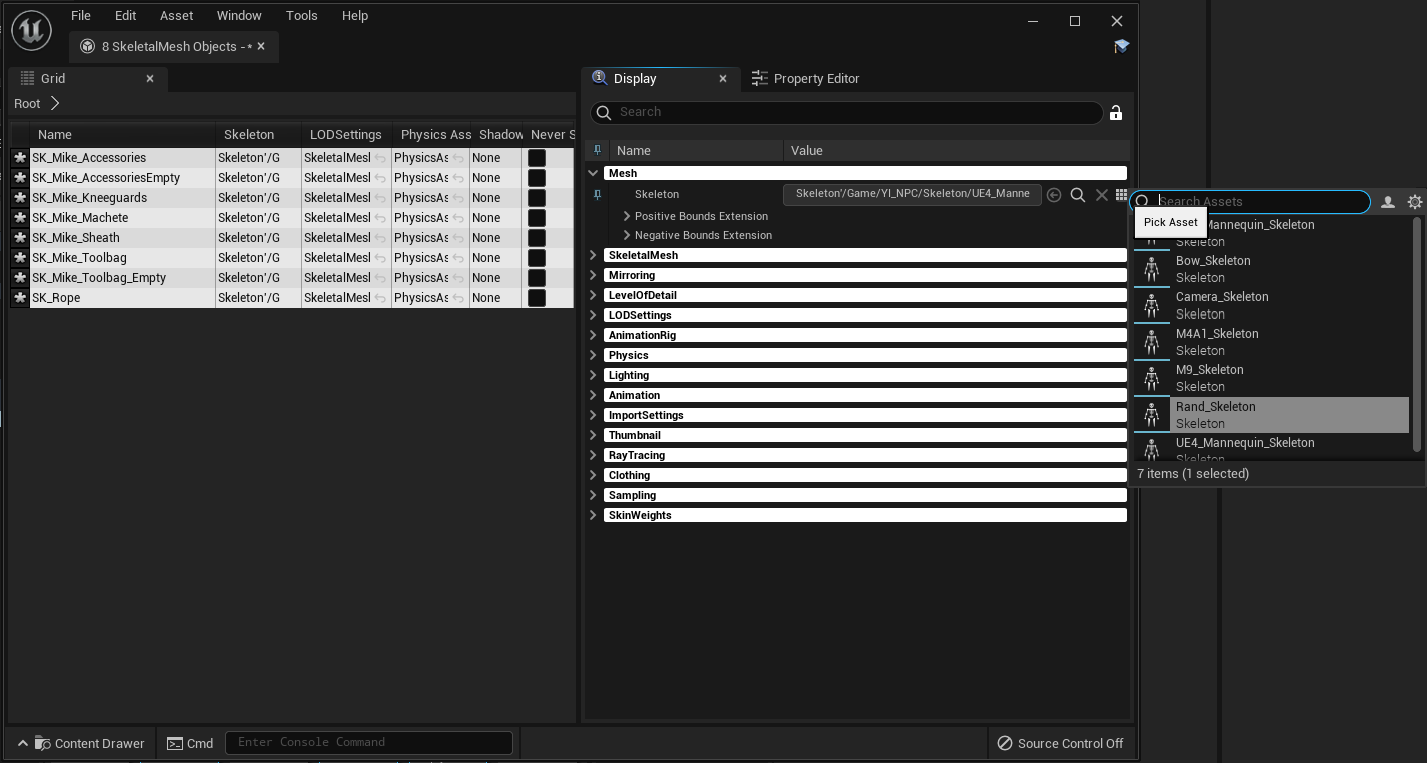
The final steps here are to select all of the static meshes that you just copied over and right-click. On the menu select:
Asset Actions > Bulk Edit via Property Matrix...
A new window will open. On the right size expand the "Mesh" menu and click on the small cluster of squares at the end of the selection area:

From the menu that opens you want to locate your skeleton for your character: for me that is Rand_Skeleton
You can just close the window after you have selected your skeleton, there are no save options.
Continue back to both the Meshes and Clothing folders and repeat this process to set the skeleton for all of the meshes you copied over.
