How to use Survival NPC - Michael "Mike" Davies with Advanced Locomotion System V4
How to Set up Survival NPC - Michael "Mike" Davies, by Yartawah Interactive, with the Advanced Locomotion System V4 in Unreal Engine 5.0.
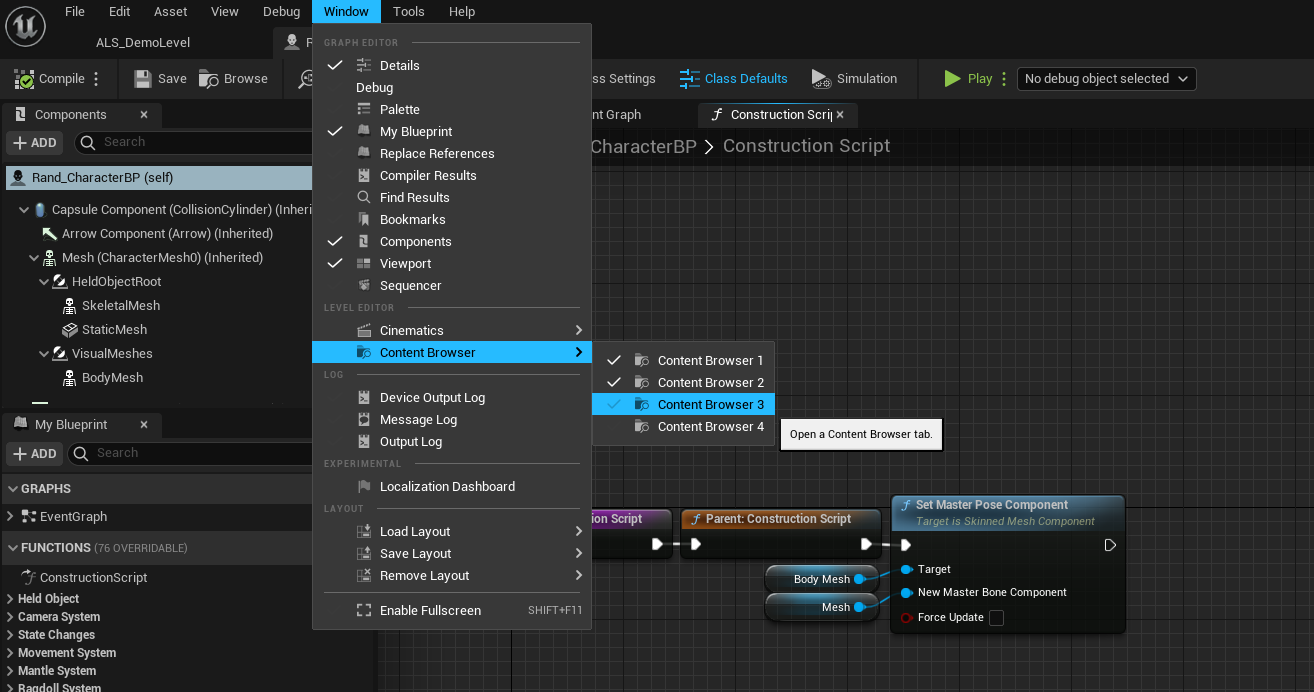
12. Adding Content Browser 3
In the top menu go to:
Window > Content Browser > Content Browser 3
And click on that. If the new Content Browser window does not automatically dock below the Blueprint graph you can manually move it there and dock it.
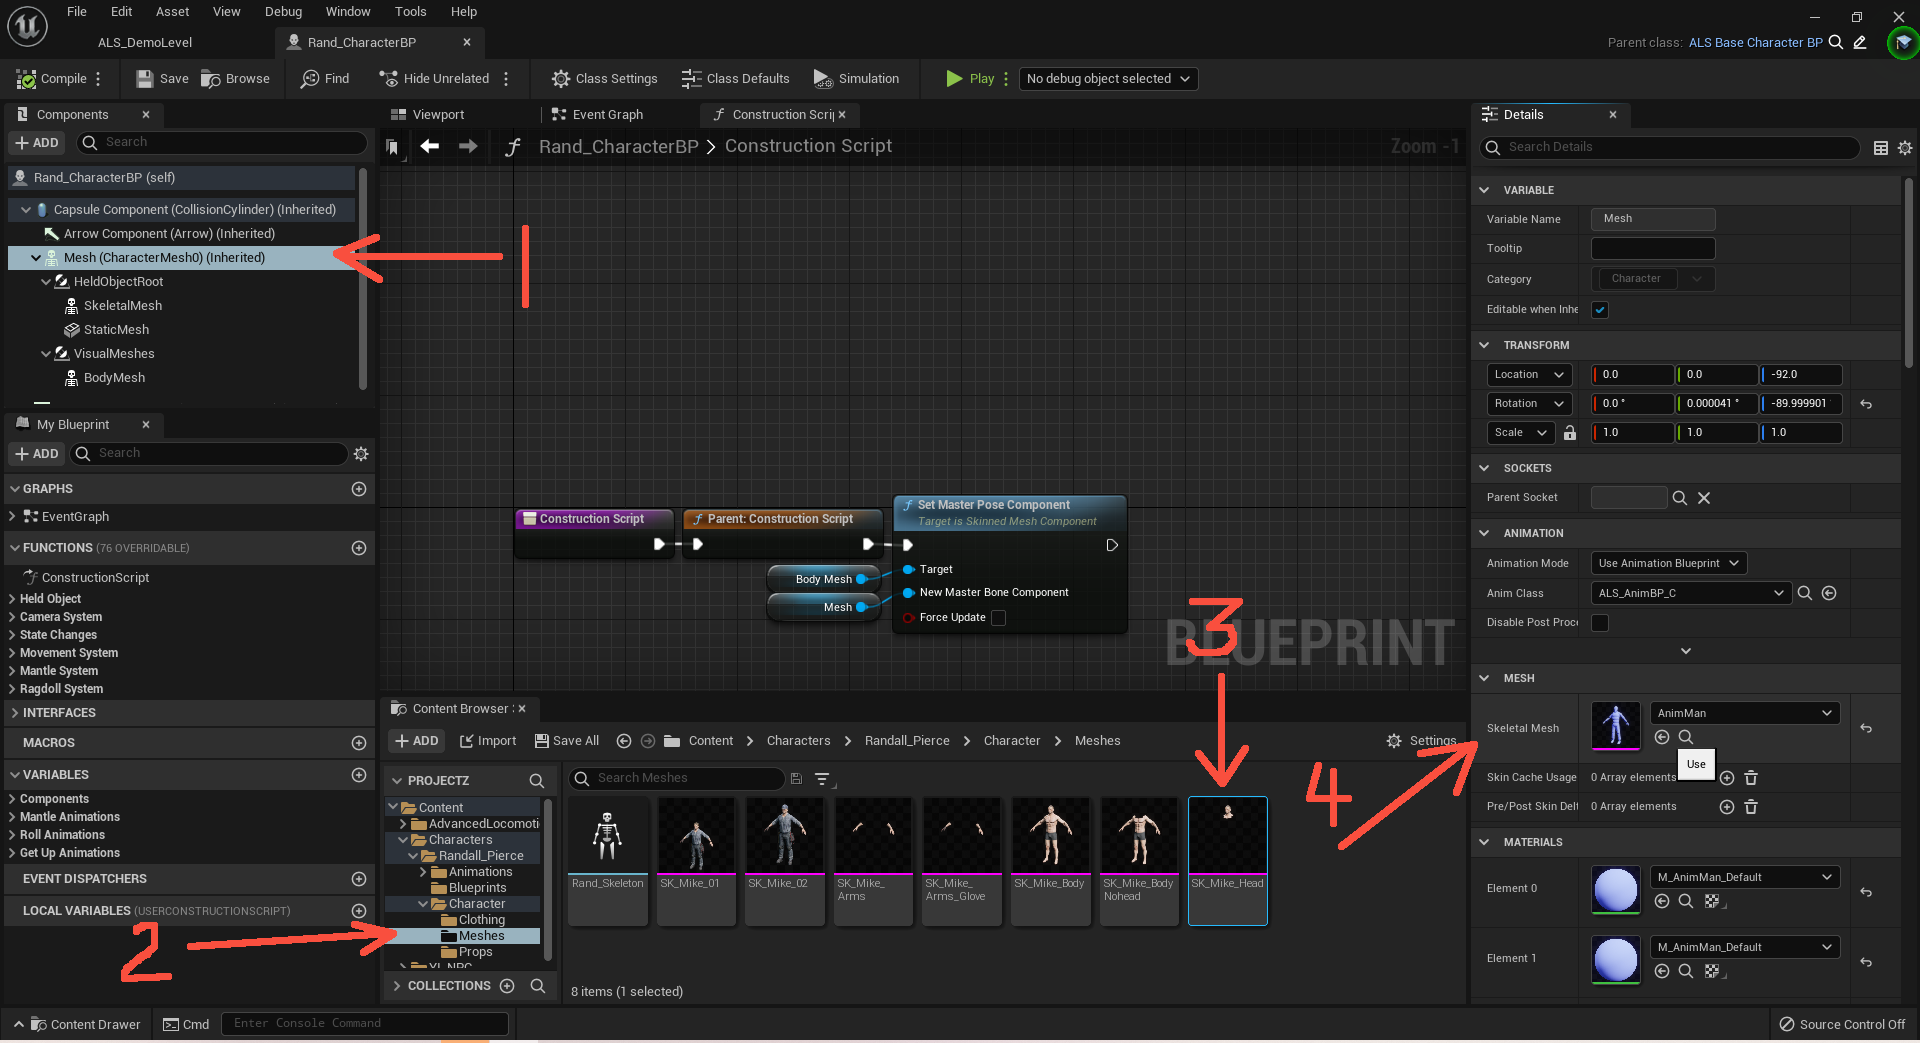
13. Set the Skeletal Mesh
- Select Mesh (CharacterMesh0) (Inherited) in the components panel in the upper left.
- In Content Browser 3 navigate to:
Characters > Randall_Pierce > Character > Meshes - Select: SK_Mike_Head
- In the Details panel go to:
Details > Mesh > Skeletal Mesh
And click on the small arrow with a circle around it.
This will set the character's head as the skeletal mesh.
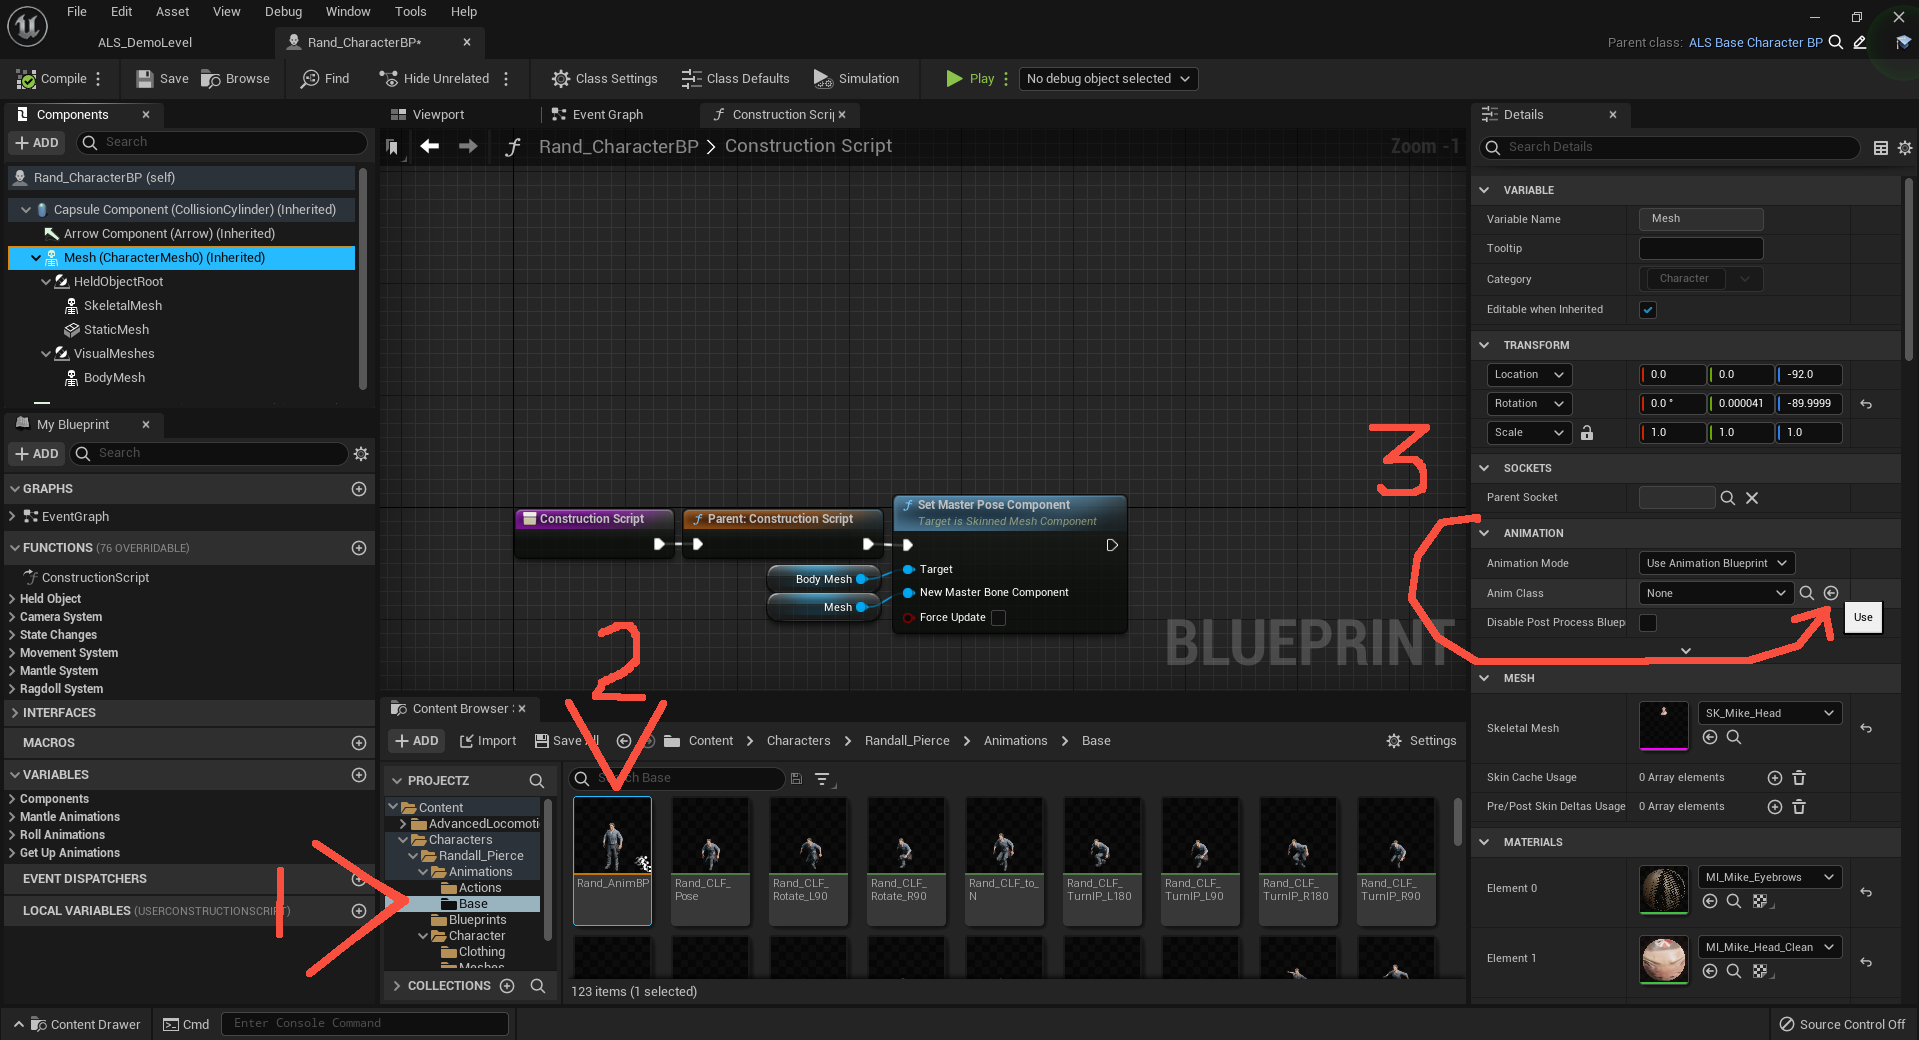
14. Set the Anim Class
- Make sure you still have Mesh (CharacterMesh0) (Inherited) selected in the components panel in the upper left.
- In Content Browser 3 navigate to:
Characters > Randall_Pierce > Character > Animations > Base - Select: Rand_AnimBP
- In the Details panel go to:
Details > Animation > Anim Class
And click on the small arrow with a circle around it.
This will set the AnimBP you made earlier as the character's animation blueprint.
15. Set the Physics Override
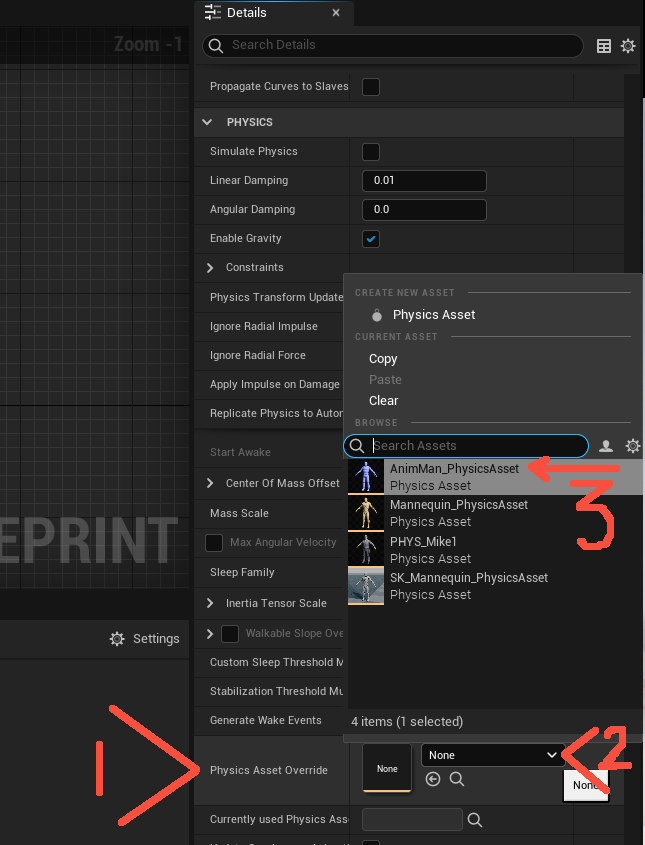
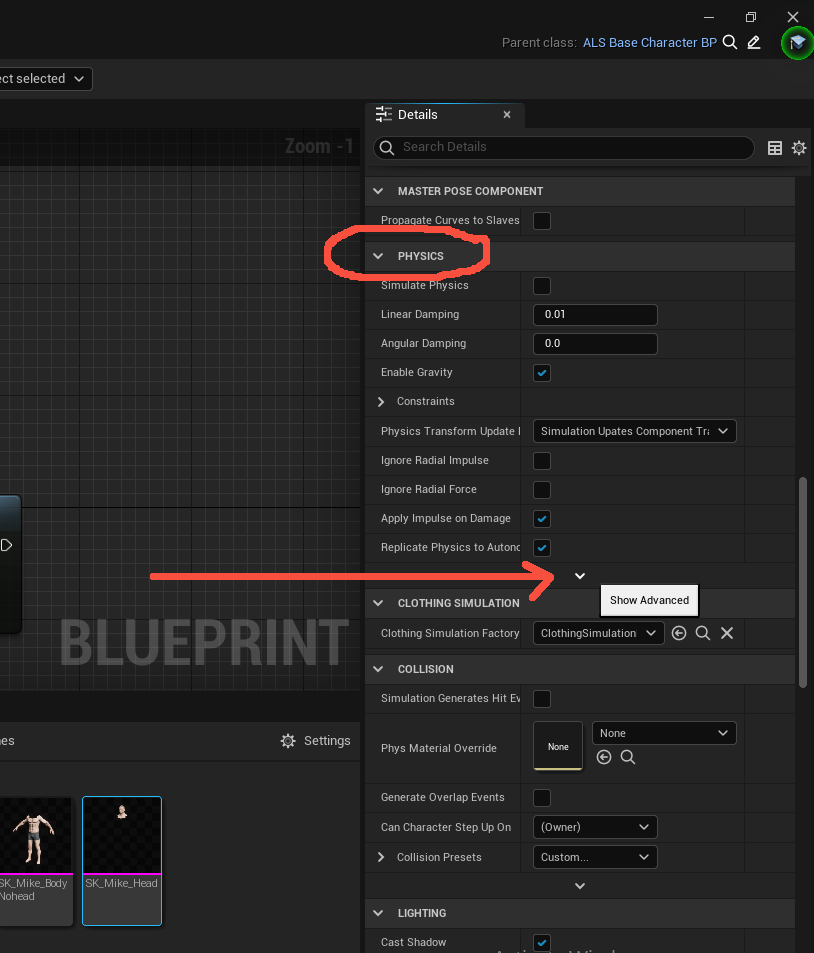
Scroll down in the Details panel on the right side of the screen until you locate the Physics section. Click on the caret at the bottom of the panel; to show the advanced section.
- Go to Physics Asset Override
- Open the menu
- Select: AnimMan_PhysicsAsset
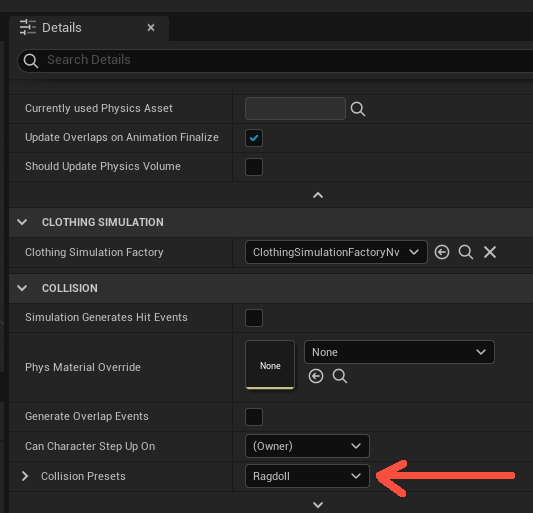
Scroll down a little further to the Collision section and change the the Collision Presets to Ragdoll on the dropdown menu. (Image below)
Compile and Save
16. Clothing Your Character
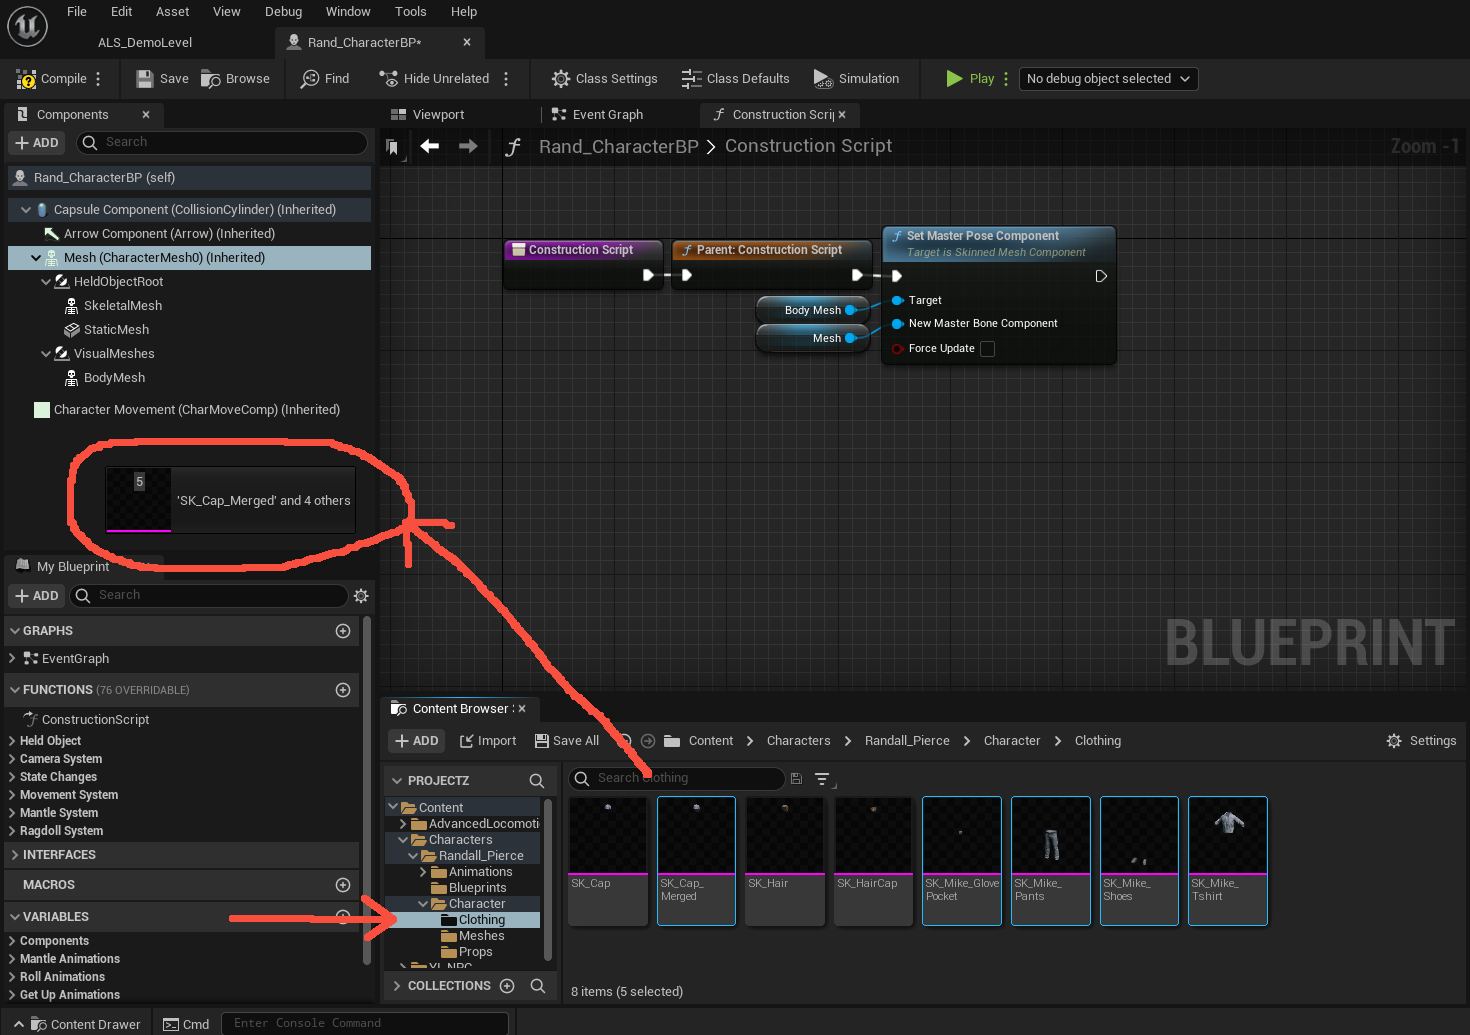
Time to get some clothes on your character. Go to:
Content > Characters > Randall_Pierce > Character > Clothing
And select:
- SK_Cap_Merged
- SK_Mike_GlovePocket
- SK_Mike_Pants
- SK_Mike_Shoes
- SK_Mike_Shirt
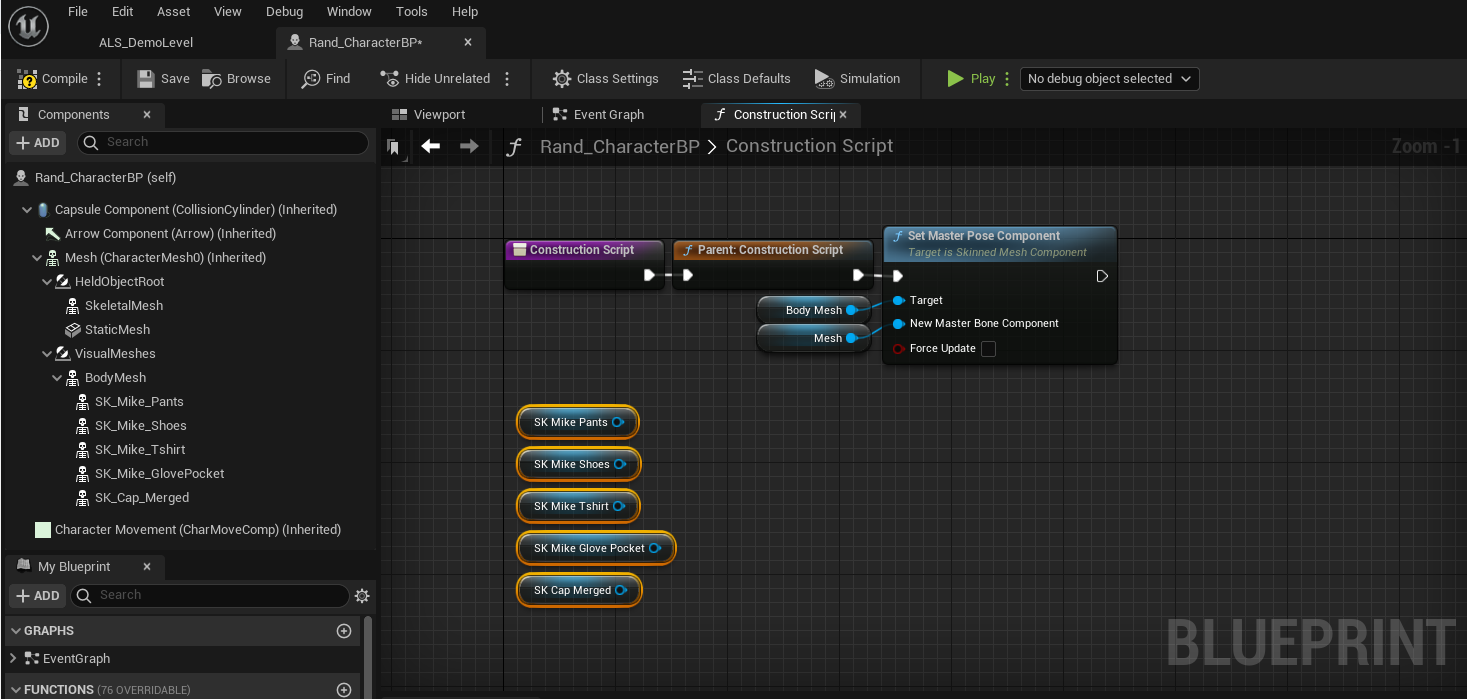
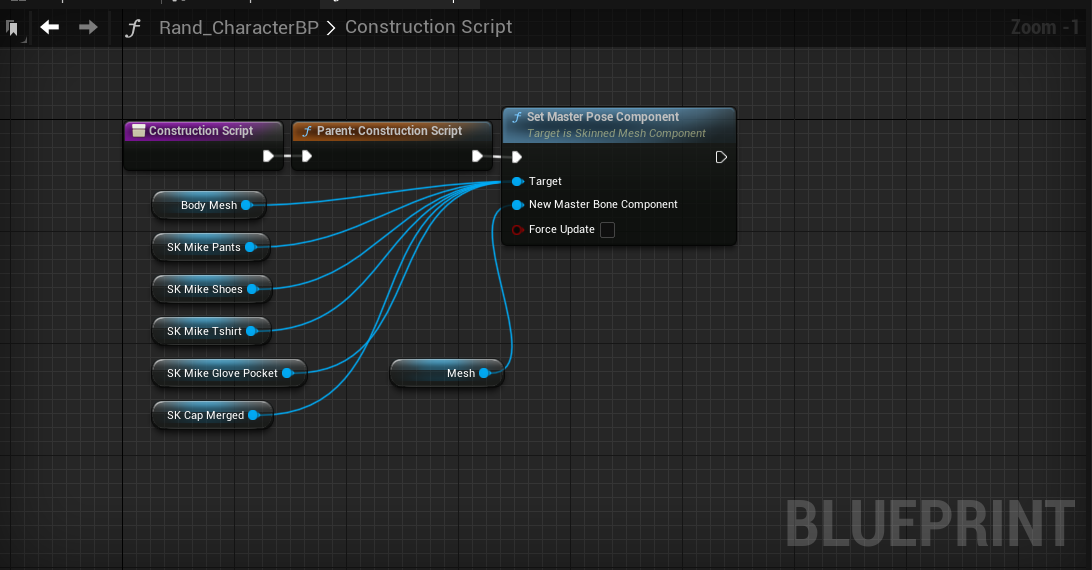
Connect the new nodes into the Target port as shown in the image to the right.
Adding the Arms
Go to:
Content > Characters > Randall_Pierce > Character > Mesh
And select either one of the following two options:
Repeat the above steps to parent the arms to the Body mesh, make them a node, and plug them into the Target port.
Compile and Save
Click on the Viewport Tab
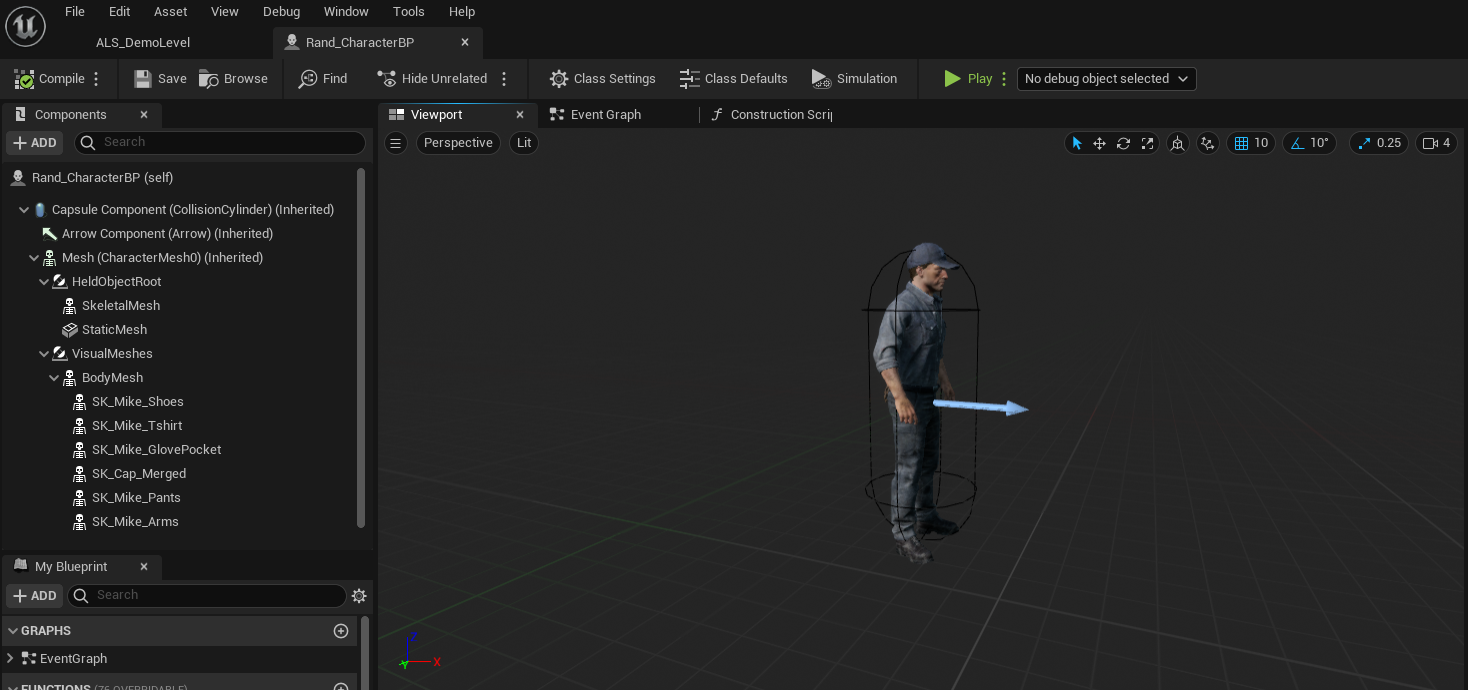
Your character should look similar to the one shown on the right.
